Best Arena 4 to 6 deck
UPDATE May 2016: This deck with updates still works really well, even though lots of new cards were released during the may 2016 update. There are lots of changes to the meta for sure, but for arenas 4 to 6 most players have informed me that they are still very successful with this deck, but it should probably be tweaked a bit to fit better into higher level arenas.
If you have issues with the new updates I suggest taking a look at the article on how to counter sparky and how to counter the royal giant. Both these cards have gotten very popular after the may update.
This is the deck that took me as a level 6 player from arena 4 to arena 6 in just a couple of hours of gameplay. I’ve tried lots of different decks while being stuck at Pekka’s Playhouse. Changing to this deck made a huge difference for me, that’s why I’m writing this detailed guide on it. Anyone struggling getting to Royal Arena should definitely check this deck out.
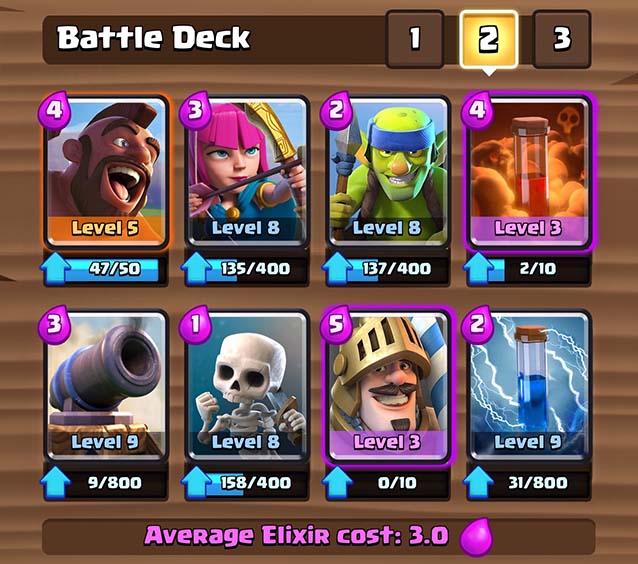
The cards.
 |
 |
 |
 |
 |
 |
 |
 |
I’m currently at Royal Arena and have yet to find any decks that work better than this one. I’m not sure how far this deck will take me, but I believe this deck will work well up to mid 2000s as well. I’m currently level 7, but I got all the way to Royal Arena with this deck at level 6.
Lightning and baby dragon are the only two epic cards in this deck. The rest of the cards are mostly lower level cards, so they are not that hard to get. Most cards can also be replaced while without effecting the deck too much.
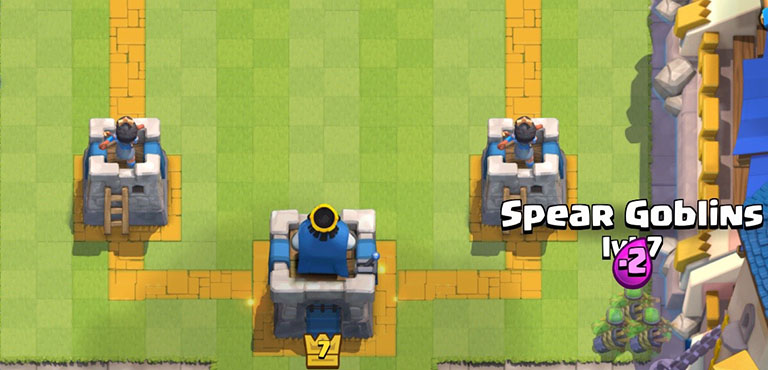
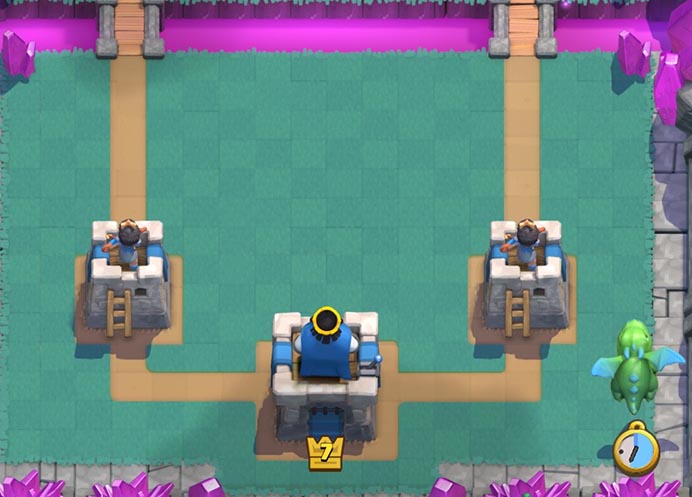
Cannon.
Tesla was changed to cannon due to the changes in the march 23. patch. The cannon fills the same role as the tesla and can be placed in the same spot.
Hog Rider.
The hog rider is very popular these days. It has a decent amount of hp and is great at making quick counter attacks killing enemy crown towers. The hog rider is used in the main push of this deck, which I talk more about below.
Baby Dragon.
The Baby Dragon is one of my favourite cards and is an important part of this deck as well. The reason this card is awesome is because it is both flying and deals splash damage, which makes it awesome at taking out enemy barbarians and minion hordes. It can also do decent damage hitting the enemy tower solo.
Archers.
With the March 2016 update Archers was put in the deck instead of Minion Horde. Putting in Archers lowered the average elixir cost of this deck from 4.3 to 4.0, which is good. Archers still do a lot of damage and are a lot harder to counter than Minion Horde.
Fireball.
This deck doesn’t use arrows, so a fireball is really needed then. You use this to take out minion horde, goblin barrel and other annoying cards. Both Arrows and Zap work really well as replacements.
Lightning.
Lately I’ve become really fond of using lightning to take out enemy witches, musketeers and wizards. You do this when they are just next to their crown tower to make it a profitable play. Lighting is also a great counter to X-Bow and building/zoo decks. Even though I prefer Lightning, I’ve had success replacing this card with Freeze, and many players prefer that.
Barbarians.
Barbarians are simply great value, four troops that have enough hotpoint to survive a fireball is awesome. Barbarians are used both for offence and defence in this deck.
Spear Goblins.
These guys are also in most of my decks. They are cheap and decent at taking out enemy flying units. I also often use them to distract enemy tower killing troops until I can deal with them.
Card replacements.
Everyone always asks about replacements, so here are my suggestions for replacements.
- The best replacement for the Hog rider is the Prince, it fills a very similar role. It can also be replaced with Balloon, Giant or Royal Giant. That makes the deck bit different, but it’s still a good deck.
- Cannon can be replaced by Tesla.
- Baby Dragon can be replaced by Witch or Wizard.
- Lightning can be replaced by Rockets or Freeze, both of these options work really well.
- Spear Goblins can be replaced by Minions.
- Fireball can be replaced by Arrows or Zap.
- Archers can be replaced by by Minions.
- Barbarians can be replaced by Knight. I’ve also tried replacing them with Pekka, which makes for a weird deck, but it worked well.
Opening. (0:00 – 0:30)
My preferred option is to open with Spear Goblins behind one of my towers. Spear Goblins are cheap at only two elixir, and I will have almost all my elixir left to react to whatever my opponent is opening with. I place them behind my towers so that I can place tanker units in front of them before they reach the bridge.
If I don’t have Spear Goblins in my opening hand I will go for the tesla. With the recent changes the tesla is an amazing defensive building. It is cheap to build, has decent amount of hit points and your opponent can’t kill it with spell when it’s not active.
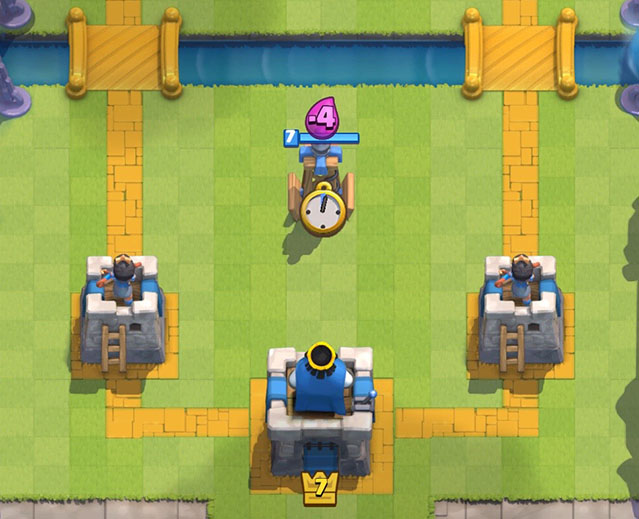
I will place the tesla in the middle of the space in front of my castle, not too close to the river to prevent opponents defensive buildings or ranged troops from shooting at it from a distance. Placing it further back also means opponent troops have to walk through my towers fire to get to it. The tesla is awesome at taking out enemy hog riders and giants.
The third best opening for this deck is the baby dragon. The baby dragon is moving slowly and does well on it’s own even without support. It is very hard to counter the baby dragon and come out on top.
Midgame. (00:30 – 2:00)
During the middle of the game the idea is to successfully counter your opponent and gain elixir advantage. Keep defending with Tesla, Baby Dragon and Barbarians. Make sure you use the right troops at the right place, I guess you can see what I did wrong below.
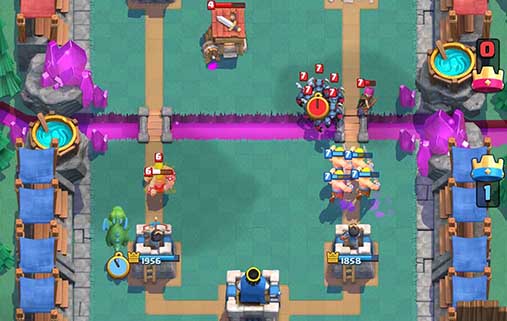
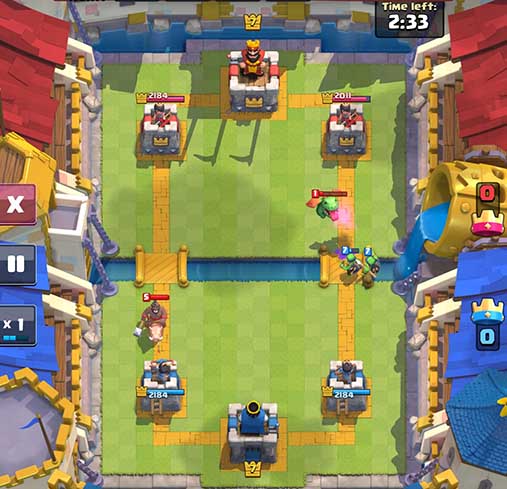
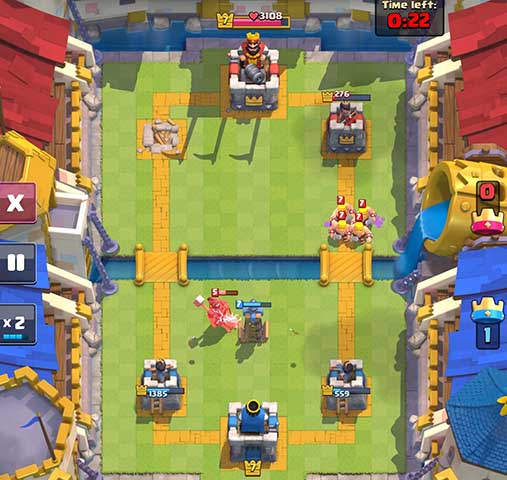
Once you have elixir advantage you want to make a push on one of his towers. Try to not be the one to push first, most games I’ve lost has been because I overcommitted in a push and got countered hard.

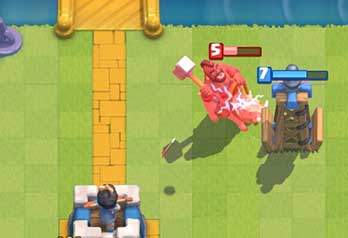
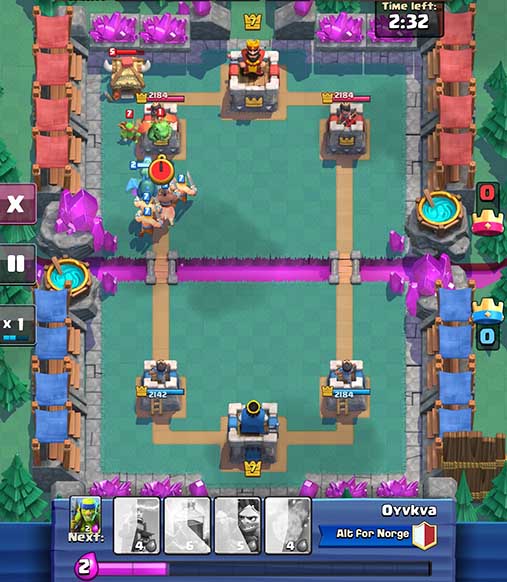
In the screenshot above you can see I’ve overcommitted with swarm troops close together, don’t do this. After that fireball hit I lost all my troops and one of my towers to his counter push.
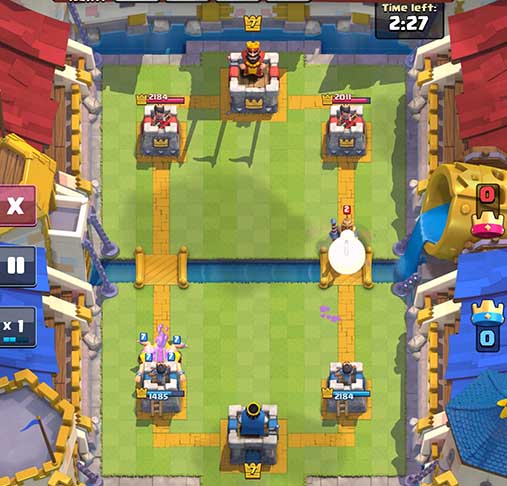
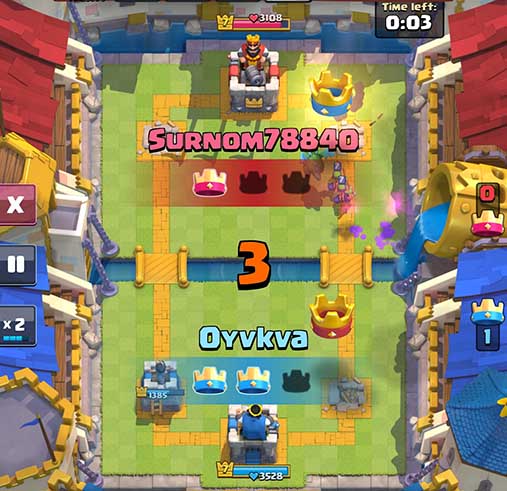
You don’t necessarily need to kill any of the enemy towers during the mid game. What is important is that you cause more damage to one of your enemy towers than he causes to any of yours. Most games are won by taking out one enemy tower while successfully defending your own.
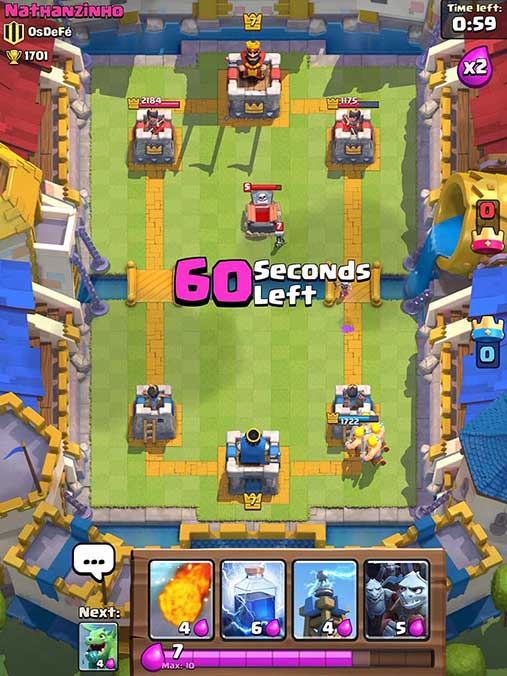
In the screenshot above we are 600 hp ahead at the end of the midgame. This is good situation to be in. Just keep playing the same way the last minute of the game and you will win the game.
Try to have one tesla up at all times, it’s so easy for enemy hog riders, giants, prices and other tower killing troops to run in if you don’t. If you don’t have a tesla out or in your hand, make sure you have other troops you can use to defend with.
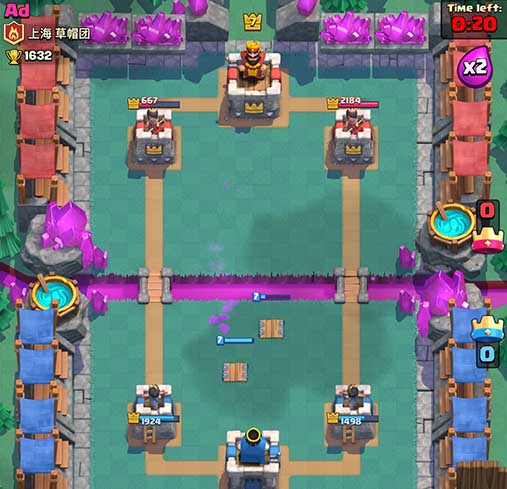
Endgame. (2:00 – 3:00)
Hopefully you have brought one of the enemy towers down to 600 hp or lower during the midgame. If you have, you should focus almost all of your effort in defending at this point in the game. That means Teslas, Baby Dragons, Barbarians and Spear Goblins. Minion Horde is risky as it’s often taken out by Arrows or Fireball which can cause you to loose your tower.
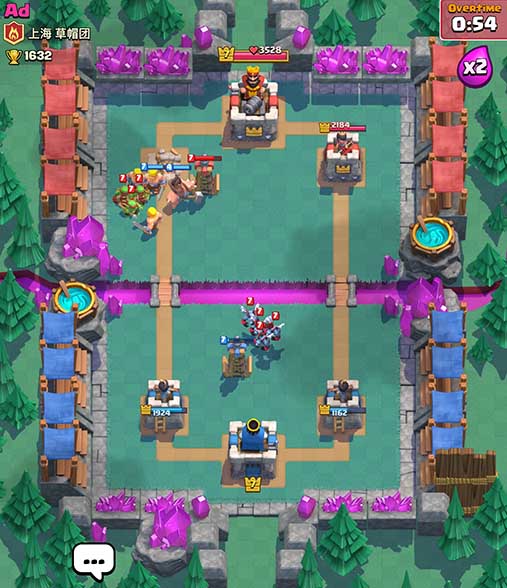
Whenever you’ve successfully repelled an enemy attack, try to get the enemy tower down to where your fireball or lightning can kill it in one hit. Then you can just keep defending and launch a fireball or lighting at the last second of normal time to take out the tower. I would say at least 20% of my victories come from taking out the enemy tower at the last second.
If you on the other hand have a lot of hit points left on the enemy tower, or even worse, he has killed one of yours already, your gameplan changes a lot. In this case you have to take more risks. Often in this case I will go for attacks in both lanes. Elixir is increasing at double speed so players get more stressed and often miss defending the lane they are not currently focusing on.
A general rule is that more behind you are in the game, the bigger risks you should take. In same cases you will ignore defending your tower or castle completely if you believe there is a chance you can take out the enemy tower before your tower is dead.
Comeback.
If you do some errors and get behind from the start of the game, don’t give up. This deck gives you a good chance at a comeback if your opponent makes errors as well. The screenshots below are from one such game.
Here I first overcommit on a push in the right lane. Because of that I’m not able to counter my opponent’s Hog Rider right away.
My opponent’s Hog Rider deals 700 damage to my left tower before I manage to kill it with my barbarians. At the same time my opponent places a Prince in the right lane. This is a huge problem, because I’m low on elixir I’m not able to counter that either.
I finally get the enemy Prince taken out with a Tesla, but not until it has taken out 1500 hp from my right tower. This leaves my really far behind, and it would have been easy to give up on the game at this point. However, other players make mistakes too and instead of giving up I decided to focus and try to turn the game around.
Turns out my opponent overcommitted too on an attack in the right lane. Then he puts the tombstone down too late which enables my Hog Rider and two Barbarians to reach the enemy tower and take it out.
After this my opponent makes lots of mistakes and I keep counter pushing while defending with Tesla. In this game Tesla really shines taking out countless Hog Riders and Princes.
Just before the end of the game I take out his last tower while he takes out one of mine. A game where I was really far behind got turned around to a two crown victory.
Strongest push.
The last thing I’d like to talk about is the strongest push of the deck. There are lots of way for this deck to take out the enemy towers, but my favourite way is to use the Baby Dragon together with Barbarians and the Hog Rider.
You start out with a normal defensive opening with your Baby Dragon behind one of your towers. Here I place it behind the left tower to take out the enemy Spear Goblins coming out of the Goblin Hut.
Once your baby dragon reaches the bridge it’s time to decide if you want to go for the push. If your opponent has played something it’s more beneficial for you to counter, you do that instead. In this case all my opponent had was the Goblin Hut, so I decided to go for the push.
Place your Barbarians in front of your Hog Rider. The Hog Rider will push the Barbarians forward making them reach the enemy tower faster. The Hog Rider will also stay out of harms way for longer and thus be able to do more damage to the enemy tower.
My opponent chose to defend with Baby Dragon and Wizard. These are decent counters, but he let my troops get too close before defending so it didn’t turn out too well for him.

Here his first tower falls just 36 seconds into the game, which leaves my at a huge advantage. Usually this deck will take longer to take out a tower, but every now and then you find the right situation for a all-in push like this.
Video guides.
Due to a lot of requests I have posted a video of the deck in action here. If you like the video and like me to continue doing those, please let me know by subscribing and liking the video, thanks!
Conclusion.
This is a defensive deck that at the same time has ways to make strong pushes. The deck does well against all other deck types I’ve faced so far, and can give you a very good win rate at arena 4 and 5. At arena 6 it does well up to 2000 or so as well. If you’re struggling to get up to the Royal Arena, definitely check the deck out.
Also, please let me know if you enjoyed this format of deck guide and if you have any questions.
I will use this deck for my friend and he is a starter so I suggest him this deck. And as I am arena 10 player I think it’s good
nice share 😀
can i get for arena 9?
What do you think about swapping lightning with zap? I feel that it’s a elixir heavy deck that I can’t really cycle to the hog fast enough.
bro this deck is amazing and i think i’m going to use it more often it has got me to frozen peak so far and hoping it will take me a little farther and i have made no changes rather than the minions with electro wizard 4 the sparky
I’m playing this exactly like you said and i’ve memorized my card counters and keep getting swarmed by giant/witch or gskel/witch combis and losing. I got thrown down to arena 3 from top of 4th and got back into fourth and immediatley thrown back. Fuck this game’s matchmaking system.
this is a great guide . my favorite cards are hog rider and mini peka . i combine these to with other cards and most of the time a win . im at arena 7 now . this game is awesome but you need a lot of gems to go ahead .
Hi! Which changes are the best to fit this deck to arena 7?
I have made a lot of changes to it and use this deck now: http://clashroyaletactics.com/arena-8-deck/
awful impossible to win agains what is played now dont use it
What arena are you playing in? I’ll post my current deck later today, might work better for you.
arena 4 but now in 3
Ah ok, well this is my current deck:
http://clashroyaletactics.com/arena-8-deck/
But again, it has cards that are not available in arena 4. Not sure what has changed in arena 4 that make this deck bad though, it still work for a lot of people.
Thank you! Jesus bless you
You’re welcome 🙂
Great article! How do you use this deck to combat hut decks?
It works really well against hut decks, use lightning. If you can hit 2 builds and a troop at the same time it is a great trade for you.
i love the hog rider . its my favorite card 😀 if you know how to use it will destroy the opponent 🙂 this game is time consuming on waiting those chests to open and you get nothing good. i found a way to generate some gems gonna buy some super magical chests now hope to get some great cards . look on my screen shoot
Damn I suck with this deck. Tried playing defensively and got my ass kicked by giants every time. Lost 5 or 6 in a row.
of course you will lose his deck sucks I RECOMMEND YOU A DECK GOBLIN BARREL(OR GOBLIN) PRINCE MUSKETEER ARROWS FIREBALL) BARBARIANS(FOR TANK)( IF NOT GIANT IF U PREFER) AND BOMB TOWER( IF NOT TOMBSTONE OR GOBLIN HUT)
ALTHOUGH I DUN USE THIS DECK BUT ITS IS SURELY GOOD I NOW AT ARENA 7 SO OBV I USE A BETTER DECK WITH LEGENDARYS!
NOW A WILL TEACH U SOMETHING AT THE START OF THE GAME YOU CAN CONSIDERING PUT BARBS AT THE VERY BACK OF THE ARENA FIRST. THEN BY THE TIME THE BARBS REACH UR ARENA TOWER, U WILL HAVE AROUND 7 ELIXERS. THEN U MAY PUT MUSKETEERS. WHEN UR MUSKETEER AND BARBS IS REACHING THE BRIDGE, YOU WILL ALREADY HAVE 5 ELIXERS SO PUT DOWN UR PRINCE. THIS SOLUTION WILL WORK UNTIL U REACH ARENA WHERE PEOPLE WILL KNOW HOW TO COUNTER THEN YOU CAN LEARN THE BEST DECK WHEN U REACH ARENA 5 BUT IF U R LUCKY THIS STRATEGY MAY WORK AT ARENA 5. BUT IF AT THE START U DO NOT HAVE PRINCE MUSKETEER OR BARBS THEN JUST PUT DOWN A RANDOM COMBO
love this decks. i hope to get the hog rider as soon as posbile its a quite interesting card . it does a lot of damage . i found a way to gain some extra gems . look on my screen shoot . hope to get some good cards with those super magical chests
You made a typo when talking about the barbarians: four troops that have enough hotpoint (hitpoints*) to survive a fireball is awesome.
Great deck btw
Are you going to update the deck now the may patch has happened?
Yeah, I’m working on that now. The patch changed a lot of stuff, so pretty much all decks will have to be updated. Not sure how I will go about doing it yet.
Still going strong with this deck at 2.4k trophies. Using Bomb Tower instead of the Cannon though
Great to hear it is still working. How are you doing facing Sparky and the updated Royal Giant with it?
Sparky is a pain in the ass. You have to counter it perfectly every time, surrounding it with Barbarians so it only kills 2 and the other ones can kill it. It’s hard, but it’s not impossible, and I’ve managed to win against quite a few times against it. Make sure to have the Tower up at all times so it targets the Tower as well. Royal Giant is quite easy, since the he can’t out range the Bomb Tower if you place it correctly. Just counter him with as much troops as you can, or he’ll demolish your crown Tower.
Yeah, I feel the same about Sparky but I’m starting to do well against him now. I’ll post an article about countering him soon, good to hear the barbarians are working out for you as well, sucks if you misplace them though.
What I have had most success with is using skeletons or spear goblins to take the first hit and then drop Barbarians. Guards work too, but they don’t do that much damage.
this are some great cards to win some trophies . my favorite is prince and freeze spell . i have found a way to get some gems . im gonna open some super magical chests now . hope to get some great cards . look at my screeen shoot for the link
i will definetly use some of this tips on the future to win trophies . my favorite arena is 6 . i hope to get there soon . i found a way to generate some gems on my account . gonna buy some super magical chests now . 😀 if you want to know the link look on my screen shoot
great tips . ethan i used your link and its working like a charm for me . generated 40000 gems. me to gonna ope some chests *_*
Awesome deck, I came here and have been using this deck since a month ago, got me from arena 3/4 all the way to 7. To those who say you can’t do well with it, you’re doing it wrong. And I’m still using the teslas instead of the cannon, you just need to wait till the opponent is on the bridge before dropping it to make it worth it,don’t drop it to early
Great to hear the deck is still working out well!
Been using this deck since I got to arena 4. Sitting at 1.9k trophies as of now. Since I get matched against a lot of spawner decks, I use the Bomb Tower instead of the cannon or the Tesla. The Bomb Tower is just broken right now.
Can the cannon be replaced by the bomb tower ?
Yes
i love this cards . this decks will defenelty help me in the future . this game is so much time consuming . you need a lot of gems to upgrade cards or you will end up on playing hours of hours to upgrade 3 4 cards . lately i have found a way to generate some gems. look at my screenshoot. im gonna open some magical chests now *_* . if you want some too i have put the link on photo .
i totally agree with you . i hate it when you have to wait to open those chest . i tested the link that you have used on screen shoot . it was fast and easy . generated some gems and gold for my self . finally no more waitings . gonna build a great deck
I love this cards . my favorite cards are the prince and hog rider but you need something to defense to . use some spell cards like the freeze one. it will stop the movements and you are going to do a lot of damage . i bet on this . also try to focus on some favorite cards not to change the deck to much .
i will defenetly use your strategy . lately this game has become so much time consuming i cant get to arena 6 . i tested your link and generate nearly 30000 gems .gonna buy some super magical chests . hope they will help me build a stronger deck .
Great deck but I swop freeze for hog, giant skel for dragon, giant for barb, goblin hut for archer, witch firTesla, zap for fireball, but everything else is the same
Yeah you just changed 6 out of 8 on the deck, everything else is same
Well I did change 6 out of 8 but everything else remains unchanged.
thanks i can reach arena 5 because of this deck(dont have lightning so replaced with rocket). now i know the power of tesla:) but lose at many times because of bomb tower. i try to push barbar and hog but my opponent use bomb tower and i cant reach their tower anymore. any suggestion?
Bomb tower is quite hard to beat with this deck. What tends to win me matches against bomb tower is too keep making good elixir trades and then be able to get through a low-hp bomb tower when they are low on elixir.
I’m having terrible results with this deck. Maybe I’m doing something wrong? I dropped from 1400 to 1000 using this deck. The tesla seems very weak. The prince takes it out in 2 hits and then moves on to do damage to my towers. The defense doesn’t handle Giants, princes, hog riders very well in a pinch. If they are on heavy attack I put up the tesla, it gets annihilated and then my goblins or barbarians aren’t enough to take them down.
All of my common cards are level 6, hog is 2, fire is 4, lightning is 1, dragon is 2
i agree with you . its to much time consuming . i have tested your link and it worked for me . generated nearly 25000 gems . im going to buy some super magical chest now . hope to get some great upgrades .
Absolutely my go-to deck. Got me to Royal Arena. Although the deck seems very average, it’s very defensive. As long as you make good elixir trades, you’ll be able to whittle the enemy towers away.
Seriously, try this deck.
Yep, even though I play another deck most of the time now, I still use this deck every now and then.
does it still work after the update
I’m impressed, from this deck, the only ones that I really used where the Barbarians, Spear Goblins and the Tesla. I spent about 1200 gold upgrading the other cards and I don’t regret it. I was having trouble using my deck to push trophies but with this one I have a streak of 11 wins! I’m a level 6, I was in arena 3 but this deck got me to arena 5 in about an hour or so, thanks a lot! Btw, if any of you are looking for a clan hit us up @ LeagueOfHeroes, our shield is a blue arrow and we currently only have 3 members. Good luck to you all!
That’s awesome, got to play really well in addition to have a good deck to get such a streak, nice 🙂
She finally stalled out on me at about 1800 or so trophies. It was a helluva run, thanks Oyvind!
I am now using this homebrew deck that I sit at around 1900+ with, and have gotten as high as 2043:
Cannon Lv8
Arrows Lv8
Freeze Lv2
Baby Dragon Lv2
Musketeer Lv5 (arguably the deck MVP)
Barbarians Lv5
Balloon Lv2
Minion Horde Lv5
I dislike having so few cheap casts, but everything has serious power, and the amount of flying often presents a problem to my opponents.
Could check out the new deck I just posted today, got me up to 2950 or so, too close to 3000 🙂
Good job on the deck! Hog rider is great with lightning
Yep, sure is 🙂
Cool deck, but not that good. I won a battle, then lost 3. 🙁
Can you make me a deck that can get me to arena 5?’
PS im f2p
Cards I have:
Freeze lv2
Pekka lv2
Prince lv2
Balloons lv2
x-bow lv2
lightning lv2
baby dragon lv2
Giant Skelly lv1
Goblin Barrel lv1
Skelly Army lv1
Rares
lv4 Valk
lv4 fireball
lv4 rocket
lv4 bomb tower
lv5 inferno tower
lv3 hog rider
lv3 mini pekka
lv3 giant
lv3 musketeer
lv4 goblin hut
lv3 or 4 tombstone
lv3 Barbarian hut
commons
lv7 archers
lv6 tesla (can be7)
lv6 spear goblins
lv6 goblins
lv6 barbarians
lv6 minion horde
lv6 minions
lv6 arrows
lv6 knight
lv6 bomber
lv5 skeletons
lv6 canonn
i think thats about it. :p
That’s a lot of cards to go over, hehe, but I’d suggest you check out the 2 latest decks I posted, both of them are working really well.
I use this deck a lot and love it. I can win a lot, it took me to arena 5.I have noticed, however, that I also lose, a lot. I’ve read your guide multiple times to figure out how to use it, but I constantly struggle to win key battles. I would appreciate any help you may have.
Well it all depends on what you’re wrong, it’s hard to say. I’ll start posting some videos here though and maybe that’d make things a bit more clear.
There is a video in the article here now.
The deck is awesome but i would change the lightning for the freeze if you got it because its cheaper and you can use the freeze offensive (to help your troops push to that tower) while the lightning is more defensive. I like playing more aggressive so the freeze is the better spell for me 😀
Very nice deck
Yeah, freeze works well too, I’ve used that a lot also.
i don’t have lightning or freeze and im not good with rocket so im considering using goblin barrel, good choice?
That could probably work okay, it would get rid of his arrows or other spell if he has it then you could go in with the barbarians and spear goblins, because he won’t have a counter spell.
Thanks for the tutorial. I’d used your deck with great success. I’d win 12 out if 15, more if I didn’t pushed or made mistakes. This is a great defensive deck. Only push if you’re sure to win otherwise be on defensive and things will take care of itself. I was at 1689 trophies then lost big time and drop to mid 1300 with many deck changes. I finally got some experience with your deck and climbing back to lower 1600. Def first is priority with the deck.
Awesome!
thank you! I used this to propel myself to spell valley, I couldn’t quite get there. I substituted Prince for Hog Rider, minion horde for baby dragon (because I don’t have the dragon), and arrows for fireball, and worked great! Thank you!
Cool, great it worked out!
I love clash royale . it is one of my best favorite game. this guid is epic . im at arena 6 now . this game is awsome but you need a lot of gems to win 🙁 go here and grab some http://clashroyaletactics.com/gems/?comm
i agree with you man . i have tested the link and generated nearly 30000 gems. bought 10 super magical chests . got some awsome cards and a legendary card
best game ever
Amazing deck! I swapped lightning for ballons tho 🙂
Interesting change, I’ll test that out. I haven’t gotten the balloon to work that well, but with the recent change they are even better.
this deck doesnt work for shit
Update: I have now rode this deck up to Arena 6 / 1700 trophies. My setup today is the same as when I started:
Spear Gobs: Lv7
Minions: Lv7
Arrows: Lv7
Tesla: Lv7 (considering Lv4 Inferno)
Hog Rider: Lv4 (close to lv5)
Baby Dragon: Lv2
Barbs: Lv7
Rocket: Lv4
I still don’t own Lightning, or else I would try that in place of the Rocket, but I’ve gotten pretty good with Rocket kills as well so Lightning is really going to have to wow me. I did try Fireball over Arrows as well, but the Arrow speed and slightly lower cost makes it too good defensively to let go of.
The tesla has definitely lost some power due to the recent nerf and the sheer power of these guys at Arena 6, but it is still a very strong card in the deck. I’ll try out an Inferno if the Golem count really goes up, but so far it is holding its own still.
Surprisingly, the Barbs have become one of the more offensive cards in the deck. I can often let them run up the inactive lane for 1,000+ damage while I defend the active lane, which gives me the late opportunity to take out a tower with hog/rocket.
Again, defeated by princes. Really like the deck but can’t counter this attack.
How do you counter Giant, Prince, dragon and witch combos? I usually lose at the end when they just overwhelm me with that. Fireball doesn’t kill them but prince is usually going by the time I’ve got the fireball
I run Rocket over Fireball, and have gotten very good at timing when the dangerous troops cluster up to deal some serious damage. Beyond that I just rely on the centralized Tesla to lure them away, and I strafe at them with minons (not horde) and Spear goblins. Alternatively I will also drop a Baby Dragon on the back of the Witch to take her out and Barb in front of the tower to act as a spike trap.
But yeah, sometimes a rush like the one you describe is just really tough to stop. In such a situation I try to at least have enough defense to prevent them from taking the King too, while I make a push on the alternate tower to even up the score.
Yeah, I think best bet is tesla and barbarians. Use barbs for the giant and prince, then try to use tesla to lure away witch and baby drag, also if possible do what mike said and put the baby drag behind his troops.
I may have found a deck that I think works really well.
It’s :
-pekka
-balloon
-wizard
-musketeer
-zap
-spear goblins
-barbarians
-arrows
You start off with a pekka behind your king tower and then as it slowly goes past one of the archer towers you place wizard, while defending the opponent if he rushes you and when he crosses the bridge you place the balloon behind, the wizard is to take out minion horde which will be used to defend against a pekka and a balloon or the skeleton army to defend against the pekka, this is a really good combo, it’s the main push of the deck, if you dont have these cards in your hand then you just use barbs and spear goblins to weaken the enemy tower. Once the balloon has reached the enemy tower then you can place zap if he places spear goblins behind his tower to stun them for a short time.
I have found this is an amazing deck, i learnt that the hard way when someone destroyed me with it because i didnt know how to defend to that push.
FYI I still dont know how to defend to that push.
Hi. I’m using this deck for 2 days now and I’m doing good. But I have a hard time to counter the Prince. I use tombstone instead of Tesla, because the Prince blow the Tesla with just one charge. Am I playing it wrong ? Thanks.
Just based on my exploration of this deck it’s been awful for me. I’m 1-7 with it and I’m trying to play it exactly as it’s been described above. Not sure what I’m doing wrong. Stuck st 1200 trophies.
This is the worst deck I’ve ever used. Only won 2 in 10 battles.
I’m still using this deck after i finally went to arena 6! I hope this deck can still do the job up to 2000 just like you. Btw i saw your new guide and will try to practice it too.
Don’t use it not the best deck just click bait
Incredibly average deck
Worked well for a lot of people though 🙂
I don’t have any idea how to use hog rider, can someone give me tips? I just land it alone in one lane and sometimes it got crusher before he can even reach enemy tower.-.
I use it also works great I just have hard time against hut decks when it gets to 60 seconds and the are able to start dropping huts left and right get way overwhelmed. Also since new patch teslas were hit big time. Less dps and down to a 40 sec timer.
Do you play Clash Royale? Do you want to unlock the chests faster and collect all cards? Visit
Could I throw in my Muskter anywhere because it has good range and attack
What is my mistake with this deck? I win 1 battle then I lose 1 then I win 1 then I lose 1 and so on:(
Hard to say with no info, what decks do you lose against?
Many different types of decks : the most of the are killing me with Giants, princes + witch or stuff like that
first i’ve got in arena 5 with this deck then i’ve dropped down to arena 4 but now i’m again in arena 5 as a level 6 so i think the deck will work out pretty well for me on my push to arena 6:) thank you for this great guide 🙂
I really think the deck isn’t that good.I’ve won 6 battles in a row and then i lost 7 in a row
Winning 6 in a row is pretty good though. And it’s easy too keep losing and playing worse and worse once you start losing.
Ok but I keep going with this Deck 🙂
Yeah if u start loosing u should stop and take a break
Great guide. I am new and started learning the game. I am level 4 now. I am still in arena 2 (700+ trophies).
My current deck is :
– Level 5 Spear Goblins
– Level 2 Mini Pekka
– Level 1 Witch
– Level 4 Arrows
– Level 2 Bomb Tower
– Level 2 Fireball
– Level 5 Archers
– Level 1 Prince
Is my current deck good? Any suggestion to make it better?
Spare cards :
– Level 4 Knight
– Level 4 Goblins
– Level 3 Giant
– Level 3 Valkyrie
– Level 4 Bomber
– Level 2 Musketeer
– Level 2 Goblin Hut
– Level 3 Minions
– Level 3 Skeletons
– Level 2 Tombstone
Also, do you recommend getting more trophies as soon as possible to unlock higher arena eventhough receive no chests?
Hey there…I needa know how to counter spawner buildings like huts? And thanks for this deck.
Lightning is perfect for that, try to get 2 spawner buildings and the tower with one lightning spell. Use the Fireball to clear the spawned troops, preferably when they are close to a building so you damage the building as well.
Thanks for the reply…BTW I’m using freeze… , 🙁
Well, you only got the Fireball then, so it will be challenging.
So lightning is better ..right??
It’s the best card for dealing with buildings yes.
Will the new gameplay changes have an effect on this deck…..and your current deck looks good….will there be a guide on that?…
The tesla is getting nerfed, so I’d have to evaluate how the decks works. And my current deck is awesome, and a lot of fun to play, I’ll make a guide on it soon.
Thanks man….?…
This is my favourite deck now:
http://clashroyaletactics.com/arena-5-deck/
Wow u made a great guide..its new right??..I wanna buy lightning for this deck.. And is lvl 1 lightning good with the deck…..anyway thanks a lot for the new deck…….cheers mate ?
Can we have some videos of this deck in action?
I don’t really make videos, but I’ll post if I find anyone else using it.
Hey guys! After practicing this deck for a day or 2 i might able to say that this deck strategy really works! I had a hard time using this deck at first because this deck really needs some patience in defending then countering right after. Changes i made are below:
Musketeer instead of archers – deadly vs dragon and against towers if left alone for sometime
Arrow instead of fireballs – less damage but you can gain elix advantage once enemy uses minion horde I’m at arena 5 going for 6 hopefully most of my battles, they have minion horde to counter barbarians.
I hope this deck can bring me up to 2,000
Glad to hear it’s working out. Musketeer can be a good replacement, I like the Musketeer as well. Not that fond of Arrows but I’m sure they work as well.
Hey buddy! Im now at arena 6 thanks to this guide! ???? i stick to the original deck line up with archers and fireball. fireball is really great when u can hit his tower and summoned troops at the same time, lighntning as well. I want to try your new guide the low elixir deck with hog as a main pusher. Will it work in arena 6?
Absolutely the worst deck I’ve ever used. Lost 7 times before I even won… and I’m playing exactly as the page describes.
Then I’m pretty sure you’re doing something wrong…it got me to Arena 5 today and competing when my troop levels are more suited for Arena 4.
That said I did swap out 3 similar cards (see my post below from yesterday).
When I first used the deck I didn’t have the Hog Rider so I had substituted it for Prince, but my thoughts on the deck weren’t based on that. I had much more success with that one compared to the one with Hog Rider. Upon switching to the Hog Rider I went from a trophy rating of 1123 down to the low 900’s.
I’ve been having great success with this deck here:
https://www.reddit.com/r/ClashRoyale/comments/495m9a/best_arena_4_deck_to_reach_arena_7_39_elixir/
After switching to the above deck I went 13 – 5 going from 942 to 1189, the highest rating I’ve ever gone to, and I can consistently stay in Arena 4 now.
Actually it really depends on your style of play after losing streak using this deck I’m finally winning and getting my trophies up you just need to practice this defensive deck
I’m already used to the play style as that’s how I would normally play, but the problem was that I just seemed to get swarmed forcing me to use my more important cards just for the sake of defense and never really getting to do any damage to them. The spells in this deck are also rather expensive to use.
The Tesla IMO is by far the most important card in the deck, and you want to place it centered above the King, but not so close that a spell would hit it and the King. That will lure most heavy hitters towards it, at which point you drop a low cost defender unit to strafe the bopper as it heads to the Tesla, and another unit on the backside of what is likely and 2+ unit rush.
Many of your defenders will survive and move towards the tower, at which point you drop the hog. Take whatever damage you deal and save your elixir for your next Tesla to repeat the process.
The reason it works is that during the dead time that their troops are walking towards the Tesla, both it and the Knight towers are dolling out damage for almost no cost.
And if you are already seeing Golems and Pekkas, then swap the Tesla for the Inferno.
Exactly! Well said.
Yeah, very good explanation. I still use Tesla facing Golems and Pekkas though, as it does better versus the range of troops I face.
Then maybe this deck is not meant for you buddy move on and use or study other deck build. It works for us and i don’t know why it is not working on you
I have, I’m using the one I linked.
You are correct i just lost 200 trophies trusting this dude
Too bad, hopefully find another deck that works. And the deck isn’t everything anyways 🙂
I am having trouble countering mass swarm deck in the last 30 second mark with this deck.
I run Rocket instead of Lightning and find I can often hit a tower and take out 1-2 huts with a single one very often, but you want to do it before they produce a heavy swarm.
Maybe you should change fireballs to arrow too and place your dragon timely
Yep, the Dragon is key, and not wasting the Fireball. Arrows works too yeah.
Replacing archer with ice wizard works wonders if you ever get him
Wish I had him, still no luck with the Legendaries, hopefully soon 😛
Hey Oyvind, thanks a ton for this excellent write-up. I just started playing this deck yesterday at Arena 4 and it is doing quite well for me at 6-2 (including taking out a few players with higher level troops than I have). I’m going to have to be careful with it as I expect it to get me to Arena 5 faster than I am ready for.
I made three changes based on my play style:
– Minions over Archers: I like the additional flexibility of having flyers vs having the archers play a speed bump role. Behind a baby dragon they are surprisingly effective at doing damage to the enemy tower (after defending of course)
– Rocket over Lightning: I don’t own Lightning, but do own a Lv3 Rocket so why not?
– Arrows over Fireball: Personal familiarity, I’ve gotten good with the Barrel>Arrows counter so I like having that in my back pocket.
Spear Gobs: Lv6 (Just upped, haven’t tried)
Minions: Lv6
Arrows: Lv6 (Just upped, haven’t tried)
Tesla: Lv5 (3rd priority upgrade)
Hog Rider: Lv2 (2nd priority upgrade)
Baby Dragon: Lv2
Barbs: Lv5 (1st priority upgrade)
Rocket: Lv3 (will probably try the Lv3 Fireball too)
The key for me, as you hinted at, has been to play defense and wait for the eventual swarm opportunity to fall into my lap. I have already had 2 people bail on the match due to a total inability to gain any offensive momentum against me.
I would say that the Tesla is the MVP of the deck so far, as well as being my strongest 1st play. It totally derails virtually every tower push against me, while causing the opposing troops to move horizontally for my weenies to pick them apart. Eventually a point comes where my defenders survive and mount a decent push, at which point I drop the Hog Rider and/or Rocket finisher for the tower. I.e. I have learned NOT to go all out for the Tower Strike, just to let my defensive troops fall into the routine pattern of finishing their defense then taking 1/4 – 1/2 of a tower down at a time. In turn almost all my wins are 1-0, which I’m fine with considering there doesn’t seem to be any additional reward for 3-crown kills.
Hey,
Thanks for the input. It’s all about tweaking good decks and coming up with something that works well and fits your play style after all. All of those replacements makes sense. Let me know what you think about Lightning when you get it, the slow casting speed of Rockets just frustrate me so much to use it 🙂
awesome deck but i changed lightning to freeze to suit
Cool, freeze might be better if you’re good at placing it
im really debating between using archers and minion horde. any tip which on i should pick
I prefer archers, I think that’s better, but it depends on your play style and how often the minion horde get shot down by arrows.
Yo love the deck but what stops you from pushing to arena 8 thanks.
Works well up to 2200 or so, level 9 players are hard to beat. Defending is the hardest, might have to put some more defence in there.
This is not a good deck when you get passed 1700+ trophies. This will not reliably get you to 2000. I’ve been to 2100 at level 7 with level 7 standard troops, I know this doesn’t work. Once this deck faces pekka or golem decks, people with level 8 cards, level 8 players, it’s not strong enough to play defense, especially with people that use elixir collectors. You will be out powered and out elixired. I dropped trophies and tried this deck, doesn’t work at high end arena 6. Good below that, but there are still better options.
Works well for me up to 2200 or so. Level 8 players are not that hard to deal with, but once you meet level 9 it becomes very challenging. Might put some more defence in there, I’m tweaking it all the time.
I’ll be asking again another question if you don’t mind so once i got back here i can read it all at once so here it goes..
1.) obviously this is a really good deck but I’m wondering what are the downside of having this kind of deck?
-is it hard to practice? (If yes how can we master it just give us some tips)
-what else do you think some downside of this deck?
2.) I’m just wondering if what type of deck or card/s you’re really having trouble with using this deck is there a certain or few card/s that is somehow hard to counter?
Again thanks in advance! I’ll be waiting for your response. ??
1. Not really, it’s one of the easiest decks to learn in my opinion.
2. X-Bow and building decks can be challenging from level 8+ players.
Hello sir! I just read the whole guide you made and most of the comments below and it looks like this deck really works i just entered arena 4 at 1,100 trophies and will definetly try this deck once i get tesla and hog rider which i don’t yet have at this moment. Grateful if you could post some on action battle in youtube for us to really see your defense first strategy. Thanks in advance!
Hi,
Still not made any videos, I’ll post here if I find anyone using the deck though. Let me know how the deck works out for you 🙂
Just got 1 loss, 1 dra, 1 1* and 5 3* win at arena 4 (1.2k+) with this.
I think this is a very good deck if you stay calm, repel enemy’s attack and counter attack correctly.
I swapped out lightning for rocket as i don’t have it yet.
Cool, glad it’s working out.
I lost 3 times in a row with this by a knight Pekka(not mini Pekka) combo that I could not combat, it always seems everyone has so much more damn elixir than me and they zerg and overcome me even when I throw all my defended at them. Btw tesla does not withstand that much damage. Any tips?
Try replacing the tesla with an Inferno Tower? Or keep the tesla and replace one of the spells with Inferno maybe.
Best Deck Ever. Thank You very much. iam level 7 but i get to arena 5 but then i drop back to arena 4 but with this deck i can stay at arena 5. Thank you
Sure, that’s cool to hear
I’ve been playing this deck before I saw this thread, except I use balloons instead of hogs and zap or arrows instead of fireballs, and I use skeleton army and not lightning. Before, I was struggling to stay abobe 1200 trophies, and I got to arena 5 so fast. I recommend this deck to everyone.
Nice, I’m still using this deck at arena 7 now
Cool, are balloons a good card to use in Royal Arena? Cuz I got there yesterday and I’m finding it a bit difficult to keep up.
OMG thanks sooo much the deck is so great I’ve been looking for decks to get me past arena 4 and this one did Thanks soooooo much
Cool, you’re welcome ?
Could I use giant skeleton instead of the hog rider? I don’t have hog or loon and I don’t really like giant
You could, the Prince is more similar though and I’d rather use him.
I don’t have prince though 😛
The only good tanky units that I have are Giant (lv. 2) and Giant skelly (lv. 1), so which one do you think would be more effective?
Switch minion horde with archers to lower elixir then giant skeleton, not a big giant fan either.
Ok thank you!
Baby Dragon Witch or Wizard i don’t have any, someone a piece of advice?
@oyvkva:disqus
Do you have problems with air units? If not Valkyrie is a good option to splash damage ground troops and tank as well.
If you have issues with air units, archers would work or what other air target units do you have available?
yeah valkyrie , seems good, i’m feeling that minions work better than archers, have you tried it out? (not minion horde, minions)
Really Great deck. i changed 2 of the cards to play more my play style. So im running hogs, baby dragon, Barbarians, Spear goblins, rocket, freeze, tesla, minion horde.
I really like the hog freeze combo then using rocket to finish of the tower
It doesn’t work all the time (every build has its counter) but extremely fun planning your next attack/defences
I like using Freeze, Rockets are just sooooo slow to land, but if you’re good at placing them I’m sure they work too 🙂
Get 100 000 Clash Royale gems here! Act fast before it ends!
So what if i can’t get lightning? it seems extremely important i can’t find it
Some players use Freeze, that works as well. Also check the first comment from Kevin, he uses both Freeze and Rockets. I’ve also tried Poison, did ok as well.
How do I counter the goblin barrel with this deck?
Fireball works well
What do you think of inferno tower instead of tesla?
If you feel you have too much trouble killing bigger units, golems, giants, pekkas, etc, it might be a better choice. That hasn’t been an issue for me though, so I prefer the Tesla.
Aweome guide man. 10/10! As an early level 6. Trust me it it’s as soooo hard to reach Spell Valley (arena 5). I tried low elixer deck, and a lot of other decks. But I just can’t pass Arena 4. Was gonna gave up, but found your guide. IN ARENA 5 RIGHT NOW! 😀
Pushing is still on 😀 I don’t know either how far I will go!
Awesome that the deck is working out that well! It’s hard reaching arena 5 for sure at level 6. Let me know how it goes 🙂
Can you show us your current deck?
Just search Alt for Norge on the clan and look for Oyvkva
Yeah, quite often I’m just testing out new decks that might not be any good though, but usually my main deck is a modification of this one. Right now I’m not able to connect to Clash Royale and check it however.
What are your thoughts about the modification? And what are your thoughts about the average elixer of the deck (with horde), because sometimes the 4.3 seems a bit high. Thanks in advance!
So far I really like the lower elixir cost that the archers give. I haven’t had time to play much with this modification though. If I keep using archers I’ll make a modification to the guide as well.
Because you put so much effort in to this topic, I want to give my opinion on it. I really really like the change of the minion horde with the archers. It’s cheaper in elixer and can’t be countered as easy as a minion horde (my opponents always dropped arrows on it and they had a 1 elixer advantage). I don’t know what to think about the Lightning spell, some moments I love it and some moments I hate it (mostly because of poor dropping :’D). Thanks for all your work!
It took a while to put together, but it’s the most popular article on the site so it was worth spending some time with.
As of now I am still using lighting (Freeze is good too, but my lvl.3 Lightning works better) and Archers. I agree that the Minion Horde is countered too much with Arrows, even Zap sometimes.
I will make an update to the guide soon.
I am using this now: http://clashroyaletactics.com/may-2016-update-facing-sparky-and-lava-hound/
This is a great deck. I’ve been using it since i just could’nt stay in Arena 4 for more then 2 battles. I,m now at 1873 trophies and still strong with this deck being my first option. Thanks alot for sharing it with us you are a life saver!
Also i use freeze over lightning
Great to hear it’s working out, I still haven’t found any decks that work better than this one, but always experimenting.
Doesn’t work
It still works very well for me
Love the format of the guide!! VERY well done!
Thanks, glad you like it
Pekka+baby dragon?
or witch to counter horde?
Prince to push?
skeleton army to counter?
rage to defend and attack?
Why not minions+ minion horde?
it is a great push strategy if they don’t have fireball or arrows.
True, but that’s rare, very few decks don’t have fireball, arrows or zap. I use zap in this deck now, works really well.
What did you replace with zap ?
I replaced Minion Horde with Zap, which makes the deck quite different but it works well. Zap either takes out minions/goblins or leave them so low that your crown tower can take them out without being damaged.
Hello, I’m really interested in this deck. What min level for each card to go to arena 6?
For arena 5, can i have lv 5 for commons, lv 3 for rares, and lv1-2 for epics?
I don’t know about min level, but I think you could do it with level 5 cards as long as you’re playing really well. For most people it’d be hard until level 6 common and 4 races though.
Hi there,
After seeing your deck and being completely impressed by it, I have decided to try it. The truth is that I’am really struggling in it, and I just spent all my gems to get the lightning from the shop. I have been playing with this deck for ages now, dropping from Arena 4 all the way down to arena 3.
I feel that there must be something I’am doing wrong, and I hope to perfect this before actually starting my push to legends youtube series. Do you mind allowing me to join your clan and playing together to see the game style and approach.
Thanks yo so much anyway for this detailed guide, have an awesome day 😛
Same thing happend with me. Just couldnt pull of this deck effectively. Though i get few wins but loses are also there. I drop from 900 trophies to 820..lol..So i,m taking a break to compose myself.
I just read whole explanation of deck n you said your first preference to start 00.00 to 00.30 with archers as they are 2 elixir cost but in your deck you didn’t take any archers n neither you mentioned archers in replacement cards section.
i got confused already… please clarify or i misseed something
1. Yeah, I’ve mixed those up a lot but I changed it now, it’s Spear Goblins.
2. I haven’t tried with cannon, but I believe it should work, yeah.
3. Lighting is good vs x-bow and troops like wizard, witch, bomber when you can either hit two at the same time or hit them together with the tower.
4. Any change make small changes in the gameplay, so you basically just have to test it out and learn with experience. Placement of the cannon or inferno tower could be the same yeah.
I just couldn’t get results with thia decm at all. Cannon seems pretty weak. I think this deck gameplay style is not for newbies like me, its more like a experience player deck where your only target to destroy one base n defense your Tower.
What i feel is this deck badly needs baby dragon ( witch is weak sub) n Tesla ( canoon is weak).
I lose too many games n trophies inside arena 3 only. Out of 15 games i won 5-6 n lost others.
I think your arena 3 deck is much better for newbies to pull off.
Inferno tower :3
lol The tombstone is always a good replacement. But when u get it I highly recomend having one defensive building(NOT tombstone or barb hut, however, gob hut does pretty well), probably tesla or inferno. I highly recomend, even if you have to get rid of a spell (out of your 2 which you should always have until u get your trustly high-lv defensive building.)
Also, this website looks like there could be pretty good articles here, I’m excited to see what’s to come 😀
Try training camps 🙂
Wow man… such a gr8 description! Kudos to you for such a brilliant explanation n best part is you posted replacement cards as well… thanks…
I just entered arena 3 n now based on my avail cards i can make this deck wrt your deck… . you tell me will that work?
Prince lv2 for hog rider
Cannon lv 1 for Tesla
Witch lv1 for Baby
Lightening lv1
SpearGoblin lv 5
Fireball lv3
Minions lv3 for Minion Horde
**I dont have barb, pekka or golem.. any other sub possible? **
What i Have : mini pekka, Valk, goblin hut, bomb tower, muskeeter, bomber, skelton, kinght, Arrows
Although you made this deck for arena 4 but i will try it in arena 3.
I think that deck will work well, what you can do is to try out bomb tower if you find that cannon doesn’t work too well. I don’t have much experience with any of those two cards.
How do you deal with prince, other than barbarians
Minion Horde works well too, kills him pretty fast
Cannon terrible replacement